The Release Workflow
A four-step wizard that takes a work item from "I've finished my change" through to "it's finalised, tagged, and the pipeline's been kicked." Open it from Deployment → Release Workflow.
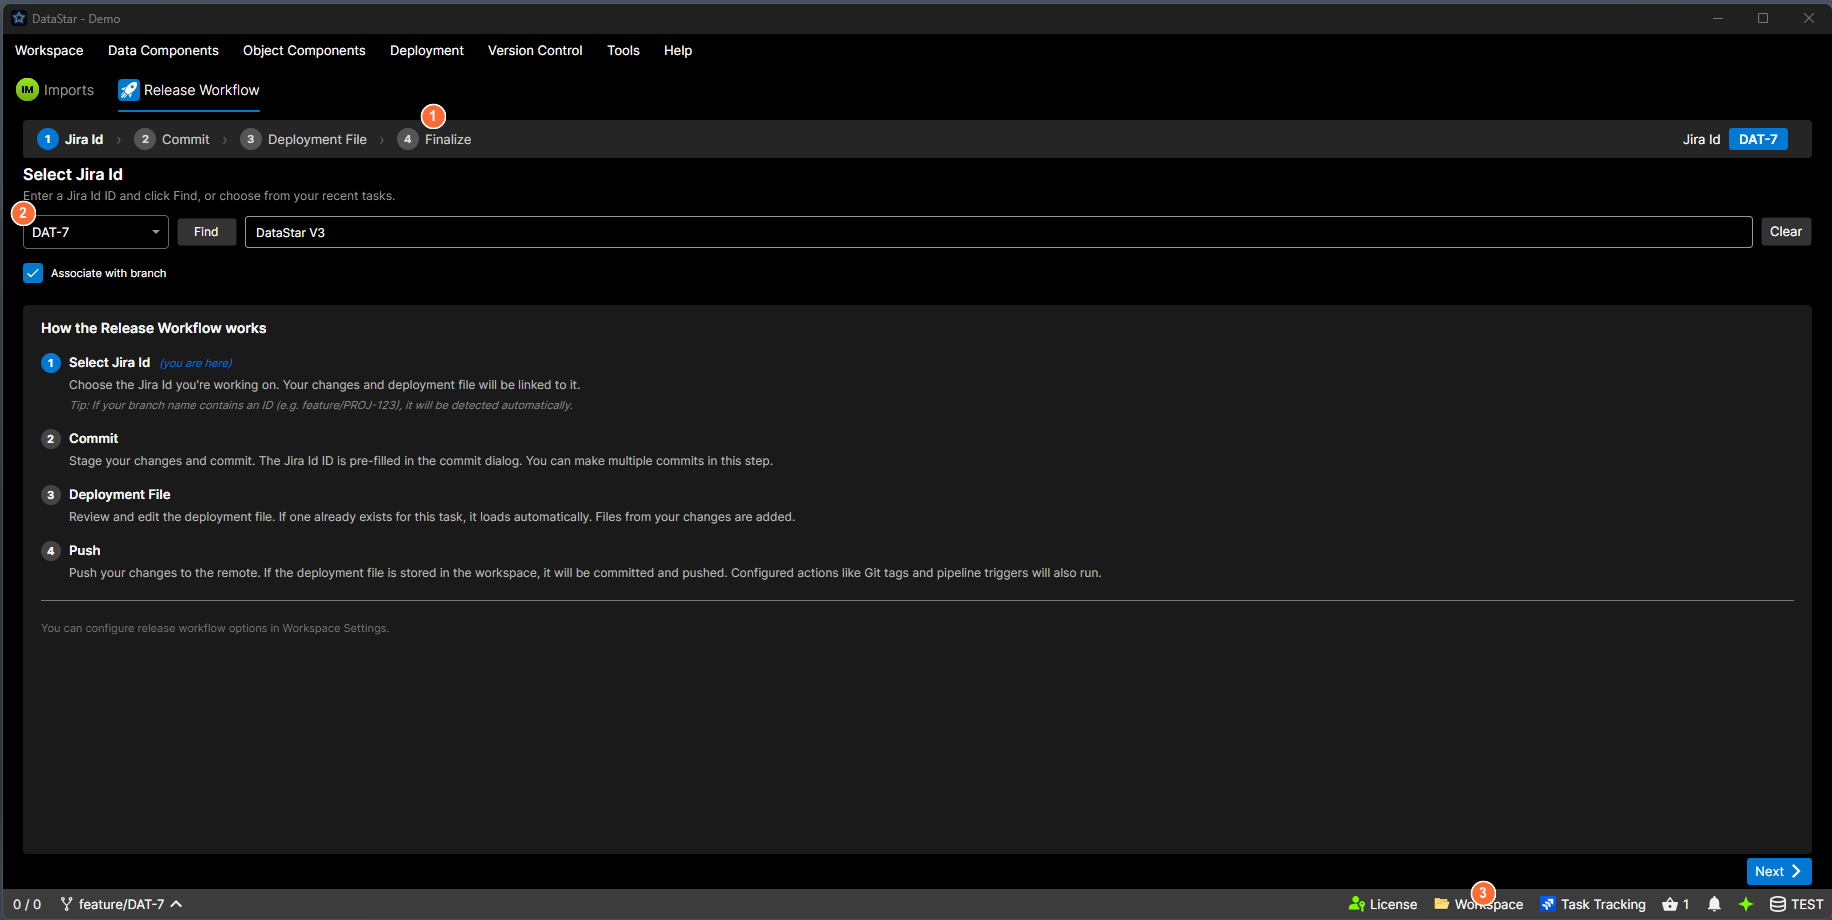
- Step indicator: numbered breadcrumb showing all four steps; the current step is highlighted.
- Current step content: the form for the active step (here, Step 1: Work Item).
- Next button: advances to the next step when the current step is complete.
The four steps
The tab shows a numbered step indicator at the top, the current step's content in the middle, and Back / Next buttons at the bottom. Back is visible whenever you can go backwards; Next is visible whenever you can go forwards.
The step labels adapt to the workspace. The Git label on step 4 is usually Push, the TFVC label is usually Finalize, and the label on step 1 depends on the task tracker (Task, Story, etc.).
Each step's full walkthrough:
When to use it
Use the Release Workflow when you're about to hand a change off: to CI/CD, to ops, to a reviewer. It bundles the VCS commit, the deployment-file production, and the push / tag / pipeline-trigger actions into a single guided flow.
Don't use it for day-to-day editing. For editing, extracting, comparing, and running scripts, work on the component grid.
Prerequisites
Before Step 1 can do anything useful, the workspace needs:
| Requirement | Why |
|---|---|
| An active version-control session (Git or TFVC) | Step 2 commits; Step 4 pushes / checks in. |
| A database connection | So generated deployment files reference a real target. |
| (Optional) A task-tracker connection | Unlocks ID lookup and task-attachment on Step 1 and Step 3. |
| (Optional) Settings on the Release tab | See Workspace Settings → Release. Configures where the deployment file goes, whether to tag, and which CI/CD pipeline to trigger on finalise. |
Without the wizard
Every step can be done manually from the regular tabs: commit from the Git Outgoing view, build a deployment from the Deployment view, push from the Version Control menu. The wizard is an ergonomic path through the common case, not the only path. For unusual release shapes (multi-ticket, cherry-picks, split commits), fall back to doing it by hand.