Step 2: Commit
The second step. Review and commit your pending changes before they go into the deployment file.
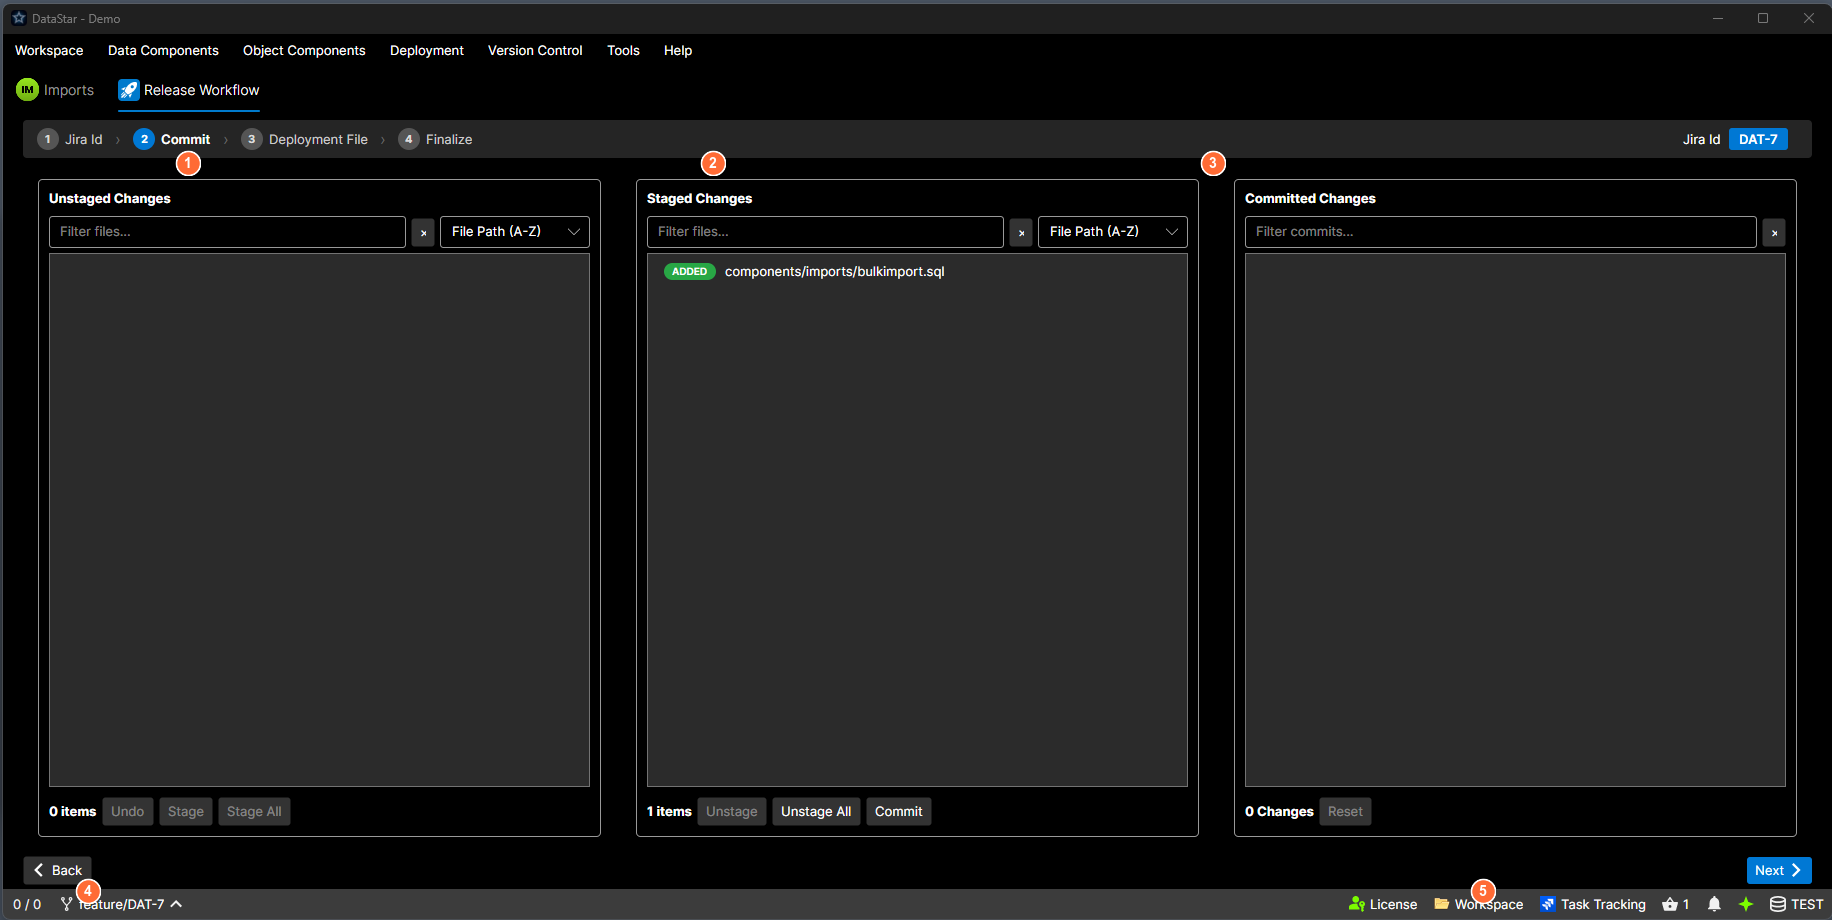
- Unstaged Changes: files with modifications not yet staged. Use Stage / Stage All to move them right.
- Staged Changes: files ready to commit. Use Unstage to move them back, or Commit to save.
- Committed Changes: commits made during this wizard session, listed with SHA and message.
- Back: return to Step 1.
- Next: advances to Step 3 once your working copy is clean.
What's on screen
This step embeds the workspace's version-control view directly.
- Git workspaces. The Git Outgoing view.
- TFVC workspaces. The TFS Pending Changes view.
From here you stage, commit, and push (or check in) exactly as you would on the standalone version-control tab. Buttons and actions come from that embedded view, not from the wizard.
Accumulated commits
Once you've made at least one commit in this step, a section labelled Commits in this session appears below the pending-changes pane. It lists every commit you've made during this wizard session:
- Short SHA (first 7-8 characters) shown in a blue badge.
- The commit message next to it.
You can keep committing multiple times; every commit you make while on Step 2 is tracked in this list. The list is used when Step 3 auto-populates the deployment file.
Moving on
Next advances to Step 3: Deployment File.
If pending changes are still present when you click Next, the wizard prompts before moving on:
- Auto-Commit: DataStar commits the remaining changes with a generated message (referencing the release task) and advances.
- Continue: advance without committing. The uncommitted changes stay on disk and won't be part of the release.
- Cancel: stay on Step 2.
The wizard advances directly without prompting when the working copy is already clean.