Step 1: Work Item
The first step of the Release Workflow. Here you pick the task that the release is for.
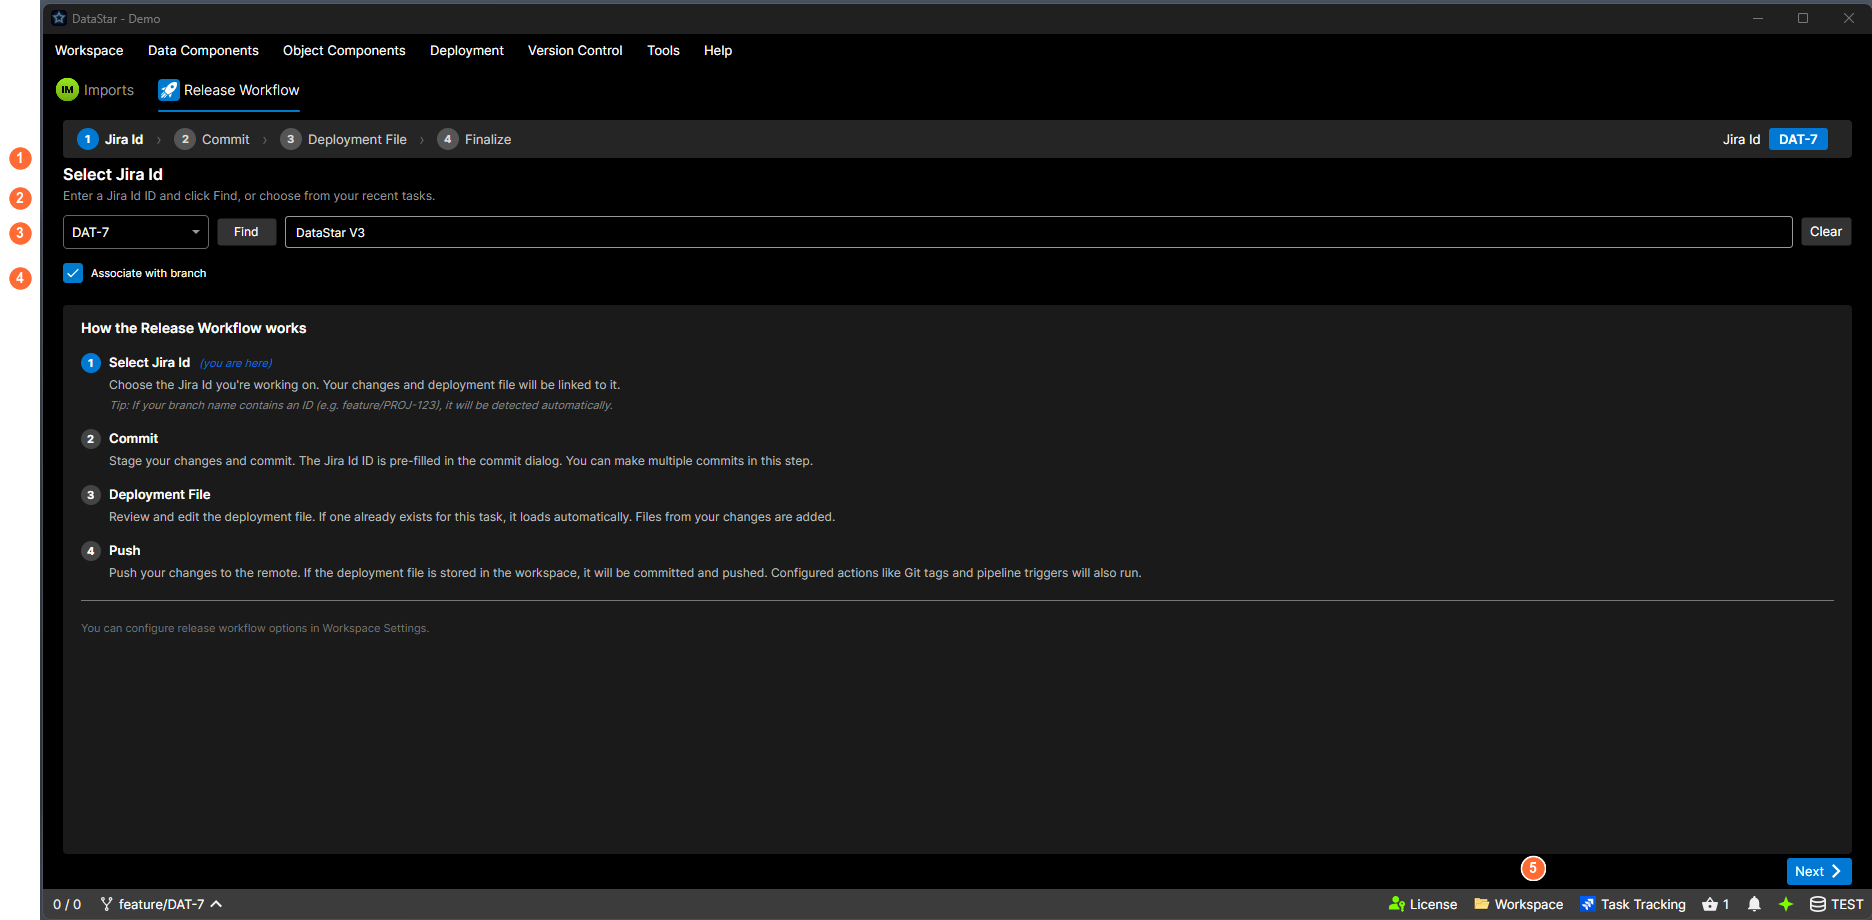
- Heading: "Select Jira Id" (adapts to your task tracker).
- Instructions: enter an ID and click Find, or choose from recent tasks.
- Input row: ID field with recent-tasks chevron, Find button, description, and Clear.
- Associate with branch: remember this task for the current branch (Git only).
- Next: advances to Step 2 once a task is loaded.
What's on screen
Heading
Select Task ID, where "Task" is replaced with whatever your connected task tracker calls its unit of work. Jira shows "Select Task ID", Azure Boards shows "Select Work Item ID". If no tracker is connected, it falls back to "Select Task ID".
Input row
| Control | What it does |
|---|---|
| Enter ID… textbox | Paste or type the ID. The watermark is the literal string "Enter ID…" and doesn't change per tracker. |
| Chevron button beside the textbox | Opens a flyout of recently-used tasks. Pick one to populate the ID field. Tooltip: "Recent tasks". |
| Find button | Looks up the ID against your task tracker and fills the description below. |
| Description (read-only) | Populated by Find. |
| Clear button | Resets the ID and description fields. |
Options (Git workspaces only)
A checkbox: Associate with branch. Tooltip: "Remember this task for this branch so it auto-fills next time."
Guidance panel
Below the input row, a scrollable explainer titled How the Release Workflow works, with four numbered steps describing what each step of the workflow does. The wording adapts between Git and TFVC (e.g. "Push" vs "Finalise", "commit" vs "check in") and branch-name auto-detection is called out for Git.
Auto-detection from the branch name
On Git workspaces, if the current branch name contains a recognised task ID (e.g. feature/PROJ-123), the ID field is pre-filled automatically.
The wizard reads from (and writes to) the same active task the status bar chip shows. If you have already set a task on the chip, this step opens with it already filled in. If you change the task here and tick Associate with branch, the chip updates the moment you advance.
Busy overlay
While Find is running, a progress bar appears with "Looking up Task ID…" (or "Looking up Work Item ID…" on Azure Boards, etc.) and a Cancel button.
Moving on
The Next button at the bottom of the window advances to Step 2: Commit once a task is loaded and its description is populated.