GIT Features
To get started using GIT you should create a remote repository, we currently support Azure GIT, GitHub, BitBucket and GitLab, other GIT repositories can be used but have not been tested. Once you have created your remote repository you will be able to configure the GIT connection in DATASTAR.
GIT Client
The minimal version of "Git For Windows" 2.38 is packaged for convenience with the application installer and will automatically be installed to the "lib" folder. As DataStar has no library dependency on "Git For Windows" users can use a different installation by updating the GIT Settings under the Configuration tab in the Options menu to use GIT from the system path. When this option is set DataStar will use the GIT executable if finds on the system path. Note: DataStar has been tested with "Git For Windows" 2.38 therefore if using an older version some features may not work as expected.
Author Details - Pease ensure that you have setup your "user.name" and "user.email" - this can be done via the configuration tab and selecting the GIT Settings option from the menu, under the Options group item.
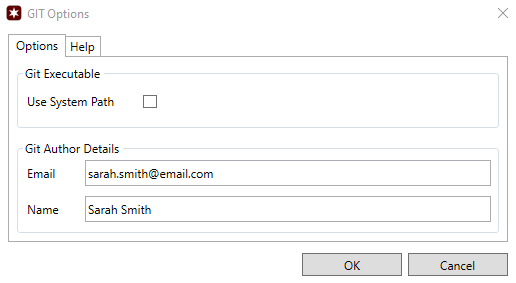
Alternatively you can set these details via the command line using the following git commands:
Connection Settings
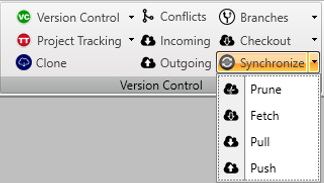
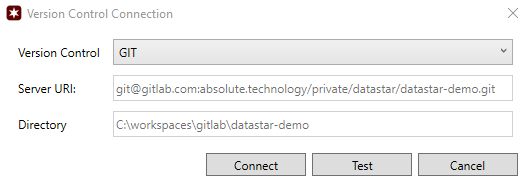
Select the Version Control button from the menu and select GIT from the drop down list. Since version 2.5 of DataStar the connection settings have been simplified. Authentication via SSH is the recommended but HTTPS is also supported via the Git Credential Manager which simplifies authentication with your Git repositories. The Git Credential manager also support multi-factor authentication.
When you have connected you should see a GIT icon in the bottom right hand status bar, this may include a yellow warning triangle if the local working folder is not recognized as a GIT repository. This would be expected if you haven't yet cloned a remote repository.
Authenticate with SSH
SSH public key authentication works with an asymmetric pair of generated encryption keys. The public key is shared with your repository provider and used to verify the initial SSH connection. The private key is kept safe and secure on your system. Before using SSH make sure you follow your organizations instructions for creating an SSH public and private key and make sure that your profile on the remote repository has the public key installed.
Note that if you are connecting to an existing workspace where the remote is already configured then the fields will be disabled. To connect to a new repository you should close all existing workspaces, this will then allow you to specify a new remote.
Authenticate with HTTPS
Git Credential Manager simplifies authentication with your Git repositories and supports support multi-factor authentication through your provider. When you connect to a Git repository from DataStar for the first time, the credential manager prompts for credentials. Git Credential Manager will then prompt you through the login process including multi factor authentication. You can find out more about the Git Credential Manager on the project GitHub.
Clone
When you click the clone button a dialog will be displayed where you can select the branch to clone and the local folder where your workspace will be located. Note the local directory must be an empty folder, you cannot clone into a folder that contains files and folders.

Once the clone has been competed, if it is a new workspace then a ".ds" folder will have been created containing the workspace settings, this folder and it's contents should be committed and pushed to the remote repository so that it is available to other users of the repository.
You can configure the workspace settings by navigating to the "File" tab and clicking the "Workspace" item in the left hand menu. See the Getting Started section on how to configure the settings.
Project Tracking
The Project Tracking option on the Version Control menu group will be enable when using GIT. This is where you configure DevOps task tracking tools so that you can associate changes with tasks. The main benefit of using the task tracking features is that it becomes very easy to then create deployments using the task and provides history, transparency and auditing of a particular change. Currently Azure Dev Ops (Work Items) are supported as well as Rally from CA Technologies and Jira from Atlassian.
JIRA - Support is provided so that you can export and import deployment files and baskets from user stories. The Jira integration does not support commit associations as this is only available via third party addons.
AZURE
Azure Dev Ops only supports certain link types for example "Commit" but this must be an Azure Dev Ops GIT repository. "GitHub Commit" links in the Azure Dev Ops Project Settings (refer to Microsoft documentation to set this up) is not currently supported by the Web Service API, this will be added in a future release. For any other GIT repository the commit links will be stored in a "commits.txt" file attached to the work item.
RALLY
When using Rally you can optionally add the repository as described in the Getting Started section if you want to associate commits within Rally.
Fetch
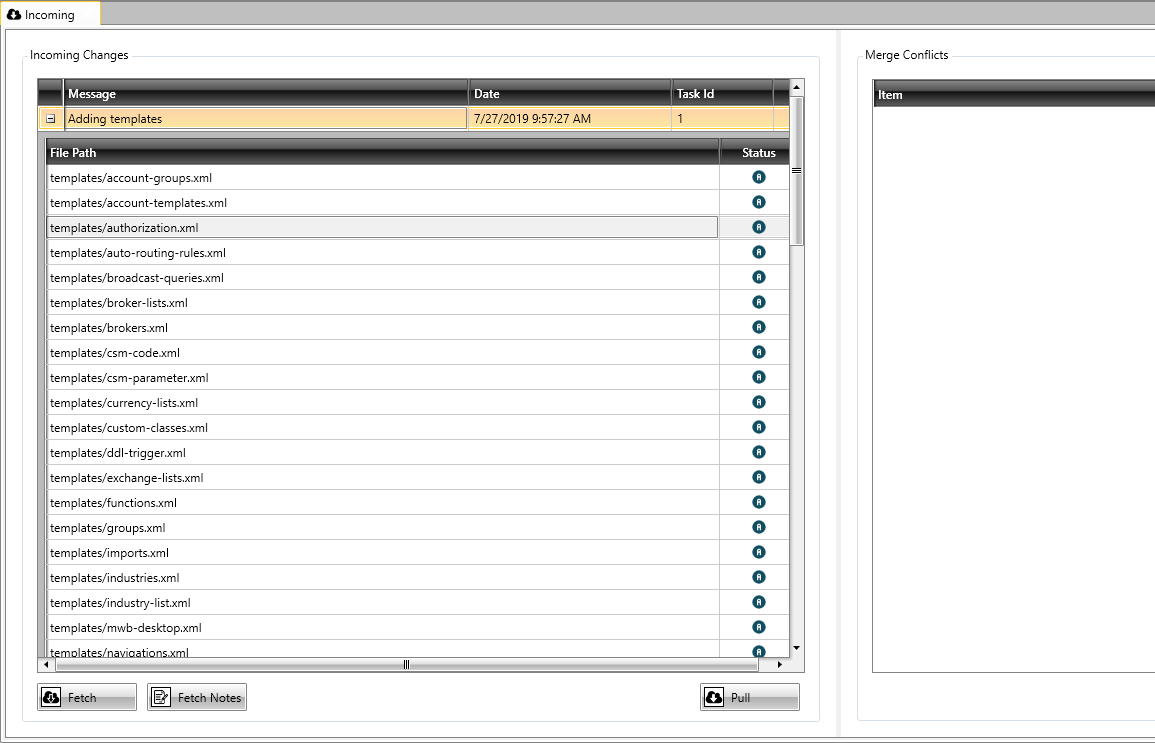
When you do a fetch, the changes from the remote repository will be obtained and stored in a separate location from your local repository. So fetch allows you to see the incoming changes without applying them. To fetch changes go to the Incoming view, when first opened it will fetch a list of incoming changes and display them with the associated task if present. Each commit is shown as a separate row which can be expanded to show the files that were changed. Hovering over the commit shows some context sensitive information including the Commit, Author, Date and Comment. A fetch can be run at anytime by using the fetch button, it does not bring the changes into your workspace and therefore it cannot result in a merge conflict. Likewise Notes can be fetched separately via the "Fetch Notes" button.
There are compare options available via the right hand mouse button:
Diff - The diff option provides a diff of the commit and therefore requires the commit row to be selected for the option to be enabled.
Compare - The compare option provides a compare of a specific file and therefore a row within the expanded commit must be selected for the option to be enabled. As with any compare feature you must have enabled the external compare tool via the configuration tab.
Pull
Pull will download latest changes from the remote repository and automatically merge those changes in the local repository. It doesn’t give you a chance to review the changes and as a result conflicts might occur (and they often do). One important thing to keep in mind is that pull will merge only into the current working branch. Other branches will stay unaffected.
Important - if you have an uncommitted change, and you try an pull changes that impact the same file you will get a conflict error, however this will not appear in the list of conflicts as you have not yet committed your change. To resolve this you should commit or revert your change, if you commit then the incoming changes will be merged or a conflict raised that can then be resolved.
Merge
GIT excels at is merging code lines. GIT is so good at this that most of the times the merges just work, so you need to be aware that when you "Pull" changes and there are changes to the same file that you are working on, GIT will automatically merge the changes without raising a conflict. You will know that this has happened as you will see a commit in the "Outgoing" view created by GIT with the message "Merge branch...". There may be occasions when GIT cannot automatically merge changes in which case it will generate a conflict and will not allow an automatic merge.
You will find some strange markers being added to the file in conflict for example <<<<<<< HEAD and >>>>>>> master. These markers were added by Git, giving information regarding which line of the file is related to the conflict. This must be manually fixed as described in the section below on Conflicts.
Push
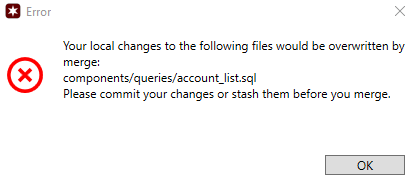
Before pushing your changes you should check whether there are any incoming changes that need to be pulled into your branch, you cannot push changes to the remote if your branch is behind the tracked remote branch. If you try and push changes in this scenario you will get an error message:

This error message can be resolved by going to the "Incoming View" and pulling the latest changes into your branch, this can result in a merge conflict which can then be resolved before pushing your changes.
Conflicts
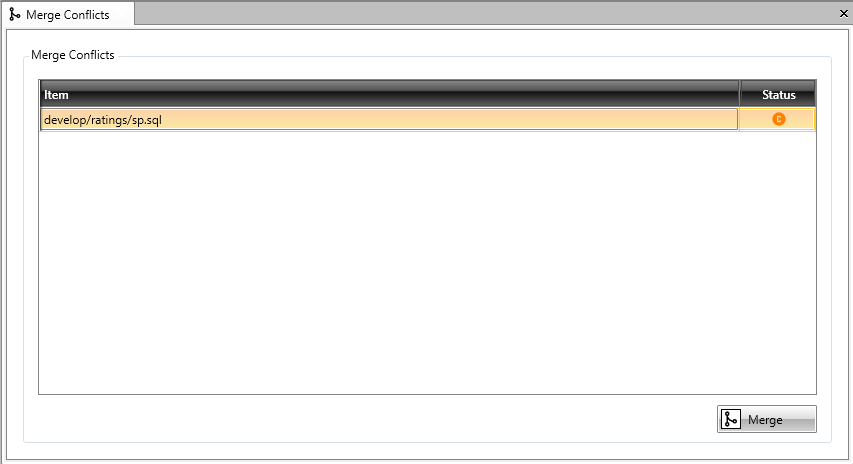
An advantage of using version control to manage your files is that several people can work concurrently on a file. One drawback is that sometimes you must resolve conflicts before you can check in your files. If your commit fails you will get an error message.
You can manage the conflict via the "Conflict" option in the Version Control ribbon menu. This will bring up a list of items that are in conflict.
The right hand mouse button context menu has the following options:
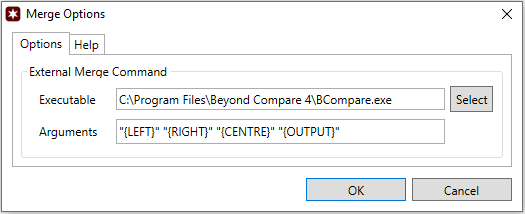
Merge Selected this will merge the files manually using the merge tool that you have configured in the Configuration Options, this option is only available where the merge tool is configured, good candidates for the merge tool are BeyondCompare or KDiff3.
You will notice that this will generate multiple versions of the file, named "ours", "base", "theirs", these will be opened in your merge tool, it is your job to review the changes so that the actual file reflects the desired content. When the main file is saved the conflict is automatically marked as resolved and the "ours", "base", "theirs" files will automatically be deleted.
Keep Ours this will overwrite the incoming version with the local version of the file.
Keep Theirs this will overwrite the local version with the incoming version.
Stash
Let’s say you are in the middle of implementing a new feature and you need to switch branches to fix a bug or revert back to where you started in the current branch. You don’t want to commit half-done work or lose your changes. Stash is a handy feature for these types of situations. It takes your changes, saves them to a temporary place and cleans up your working directory. This allows you to switch to other branches or work elsewhere. This feature is not currently supported by the GUI, however you can use the GIT command line tools, as show below:
To stash you current work:
Once you stash, you are free to switch branches. When you are ready to resume working on the changes you stashed, you can apply the stash:
You can stash multiple times. Use git stash list command to see to list of stashes stored on the stash stack.
$ git stash list
stash@{0}: WIP on master: d724198 Feature A
stash@{1}: WIP on master: d724198 Feature B
stash@{2}: WIP on master: c9a03f4 Feature C
git stash apply restores the most recent save, stash@{0} in this case. To restore one of the older stashes, specify its name e.g. git stash apply stash@{2}.
A stash could be applied to any branch not just the same branch it was saved from.
Note: Stash will ignore ‘un-tracked’ files. If you added a new file, you must first add it to the index using git add before stashing.
Diff
The diff view can be used to show differences being applied, it will look something like this:
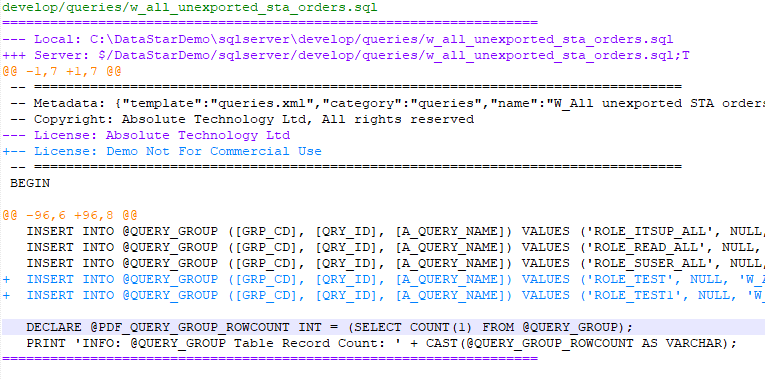
To make clear what is actually compared, a diff output always starts by declaring which files are are being compared, in this case Local and Server. Further down in the output, the actual changes will be marked as coming from Local or Server. In order to tell them apart, Local and Server are each assigned a symbol: for Local version, this is a minus ("-") sign and for the Server version, a plus ("+") sign is used.
Chunk
A diff doesn't show the complete file from beginning to end: you wouldn't want to see everything in a 10,000 lines file, when only 2 lines have changed. Instead, it only shows those portions that were actually modified. Such a portion is called a "chunk" (or "hunk"). In addition to the actual changed lines, a chunk also contains a bit of "context": some (unchanged) lines before and after the modification so you can better understand in what context that change happened.
Chunk Header
Each of these chunks is prepended by a header. Enclosed in two "@" signs each, Git tells you which lines were affected. In our case the following lines are represented in the second chunk:
- From the Local file (represented by a "-"), 6 lines are extracted, beginning from line no. 96
- From file Server file (represented by a "+"), 8 lines are displayed, also starting from line no. 96
Changes
Each changed line is prepended with either a "+" or a "-" symbol. As explained, these symbols help you understand how exactly version local and server look: a line that is prepended with a "-" sign comes from local, while a line with a "+" sign comes from server. In most cases, DATASTAR diffs the files in such a way that you can think of "-" (minus) as "old" content and "+" (plus) as "new" content - although this is not always the case as there could be new server content.
Branches
It is easy to switch branches using the branch menu which will show the local branches, you can checkout other branches from the remote repository using the "Checkout" option.
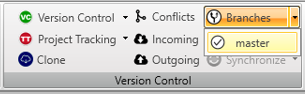
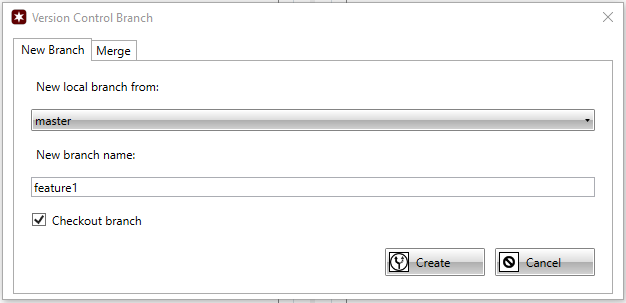
If you click on the "Branches" button rather than using the drop down, then a branch dialog window will be displayed, this allows you to create a new branch or merge a branch.
Prune
Over time you may end up with branches that have been merged and deleted in the remote repository. However these branches are still available in the local repository and overtime can cause the list of branches to become difficult to manage. These can be "pruned" using the menu option under the "synchronize" button. This will check if any of the remote branches can be pruned and will give you the option to remove these locally.